Exploring NVIDIA Jetson: Learnings, Challenges, and Insights
A friend gave me an NVIDIA Jetson Xavier GPU, and my initial goal was to experiment with running a 7B LLAMA model. What started as a simple experiment turned into a deep dive into CPU architectures, dependencies, and the state of edge computing today. Here’s what I learned.
What is the NVIDIA Jetson?
The NVIDIA Jetson Xavier is a compact device powered by an ARM-based CPU, specifically designed for AI at the edge. It’s optimized for:
- Robotics and real-time AI inference.
- IoT applications, where low power consumption and efficient processing are key.
- Embedded AI, where models need to run locally without relying on cloud infrastructure.

Setup Phase
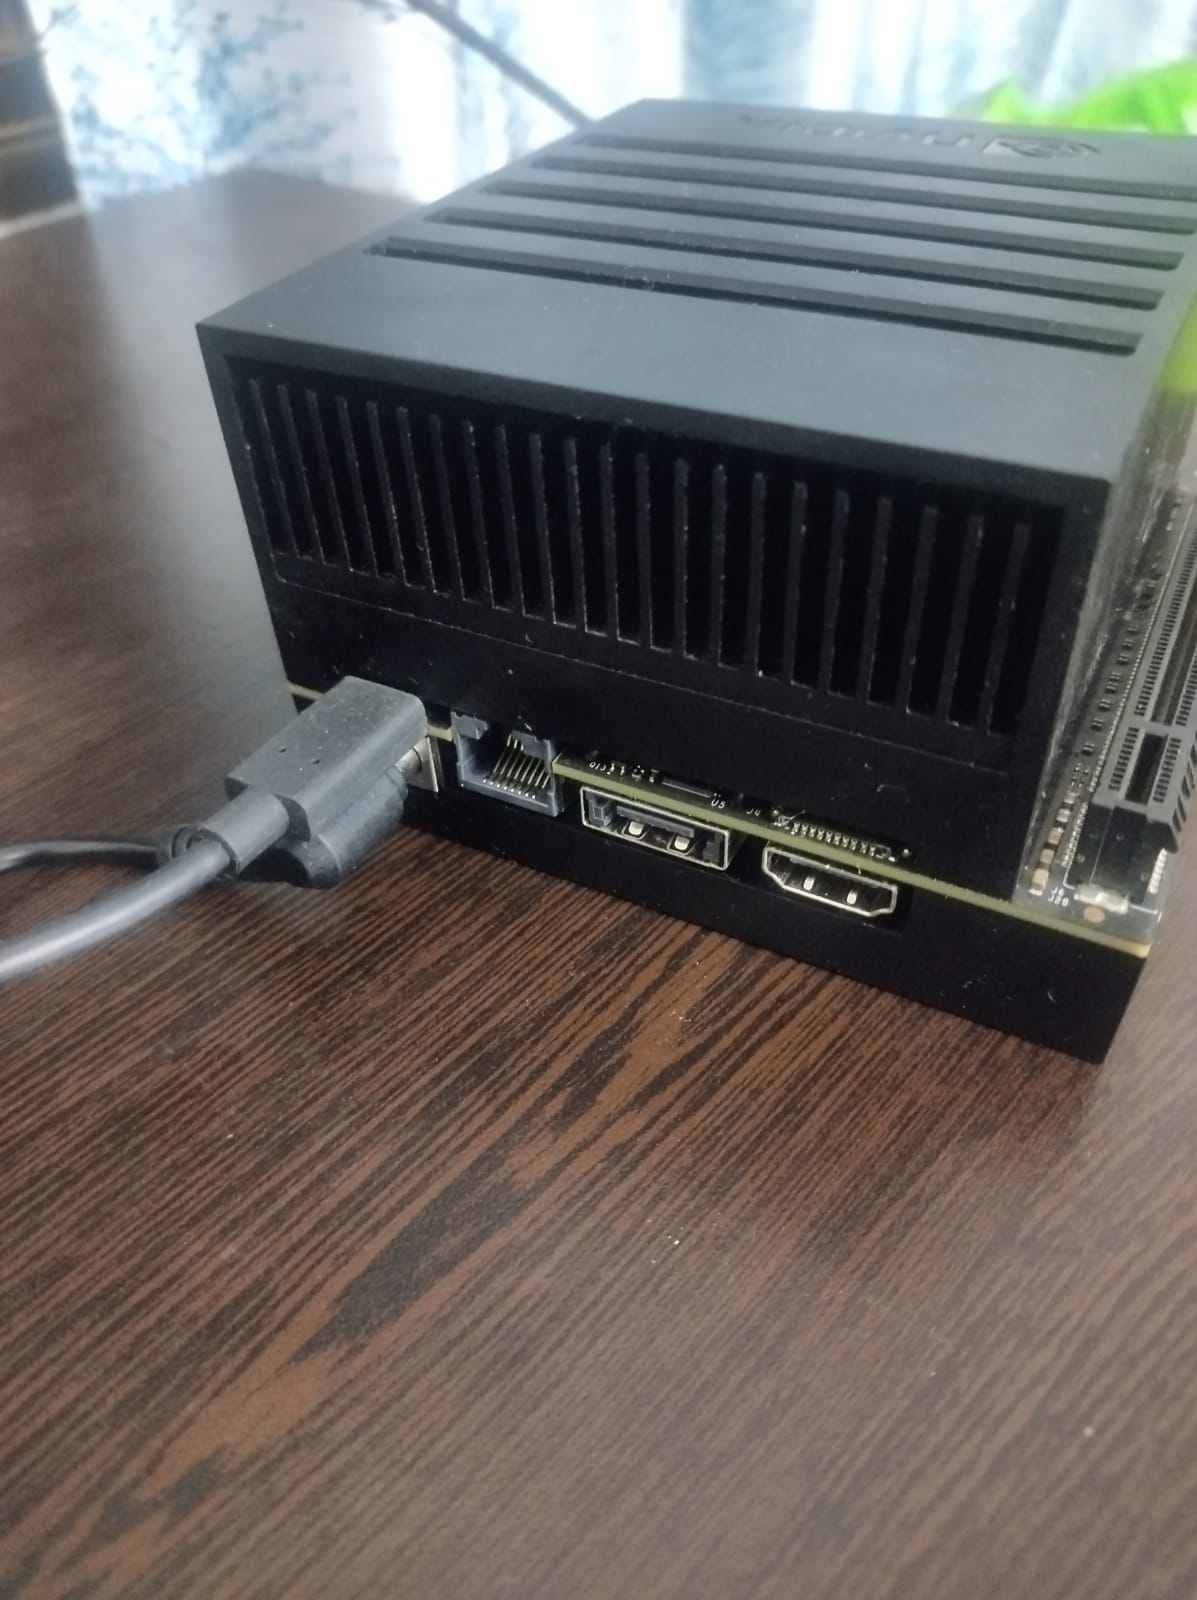
I began by connecting the Jetson Xavier to my Ubuntu laptop using a USB-A to USB-C cable. The laptop would act as the host machine, running NVIDIA’s JetPack SDK Manager, which is used for flashing and configuring the Jetson.
To provide internet connectivity for the Jetson during the setup, I connected it to an Ethernet cable and powered it using a Type-B plug. With the physical setup complete, I launched the SDK Manager on my laptop, ready to flash the Jetson’s operating system.
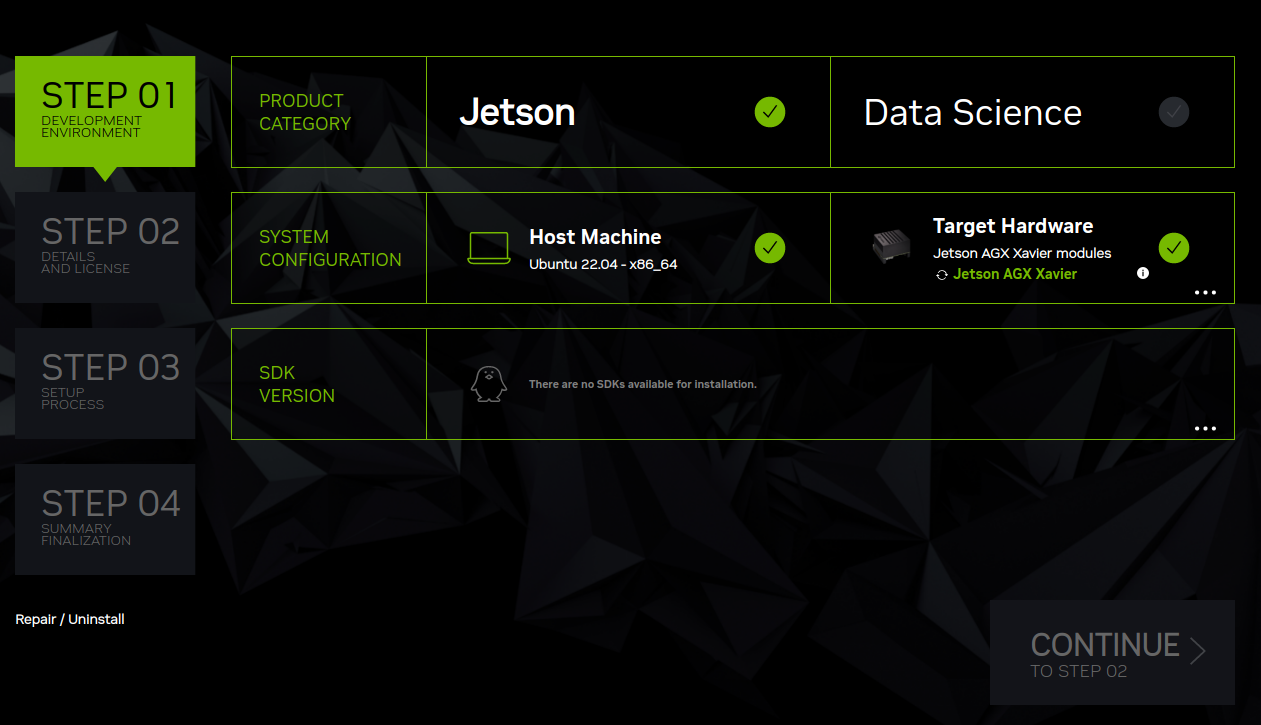
This realization came after the SDK Manager failed to find the specific OS version for the device. It suggested I check archived SDKs, but those required a compatible host system, and my Ubuntu laptop didn’t meet the exact requirements for the archived versions. Thankfully, I realized flashing wasn’t necessary because the device already had an OS installed.
The Flashing Process (Steps I Tried)
Even though I didn’t complete the flashing process, here’s what I learned about how to flash the Jetson OS using the JetPack SDK:
Step 1: Download and Install the JetPack SDK
-
Download the SDK Manager from NVIDIA: JetPack SDK Downloads
Install the SDK Manager:
chmod +x sdkmanager_<version>_amd64.deb

sudo dpkg -i sdkmanager_<version>_amd64.deb

sudo apt-get update

sudo apt-get install -f
-
Launch the SDK Manager:
sdkmanager
- Connect the Jetson
- Connect the Jetson to the host system using a USB-A to USB-C cable.
- Boot the Jetson into recovery mode
- Power off the Jetson.
- Hold the Force Recovery button and press the Power button.
- The SDK Manager should detect the device automatically.
I couldn’t find the OS so older OS it asked me to go to archived sdkmanager and then there my ubuntu host wasn’t compatible thankfully the OS was already flashewd
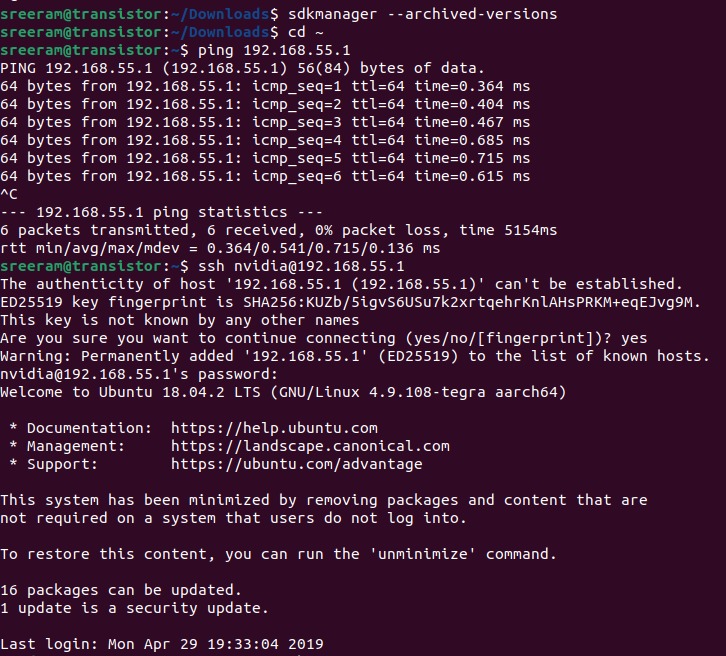
SSH into the Jetson
Since my Jetson was operational, I skipped flashing and connected via SSH:
ssh nvidia@<Jetson_IP_or_USB>
Default credentials:
-
Username: nvidia
-
Password: nvidia
The Journey to Install Ollama
With the Jetson operational after connecting via SSH, I was eager to jump into running Ollama. However, this excitement quickly hit a technical wall: Ollama is optimized for x86 architectures, while the Jetson Xavier operates on an ARM64 CPU. This fundamental difference in architecture led to a deeper exploration of technical concepts and challenges.
1. ARM vs. x86 Architecture:
The first hurdle was understanding why Ollama wouldn’t run on the Jetson. Here’s what I learned:
- ARM Architecture:
- ARM CPUs are designed for power efficiency and are widely used in embedded systems, IoT devices, and even modern smartphones.
- Jetson’s ARM-based architecture excels at running lightweight, edge AI workloads with minimal power consumption.
- x86 Architecture:
- x86 CPUs dominate the desktop, server, and high-performance computing space due to their raw computational power and compatibility with most software tools.
- Ollama, like many large language models (LLMs), relies on libraries and tools specifically compiled and optimized for x86.
To bridge the gap, I explored possible solutions, such as recompiling code for ARM or finding pre-compiled ARM binaries.
2. Dependency Issues:
Running ChatLLAMA required dependencies like PyTorch, Hugging Face Transformers, and AutoGPTQ. Here’s what I faced:
- PyTorch:
- NVIDIA provides ARM-compatible PyTorch builds, but installing them is not straightforward. I had to locate the correct
.whlfile compatible with Python 3.10 (since Jetson’s default Python was outdated). - Issues like missing CUDA support for certain precompiled binaries further complicated the process.
- NVIDIA provides ARM-compatible PyTorch builds, but installing them is not straightforward. I had to locate the correct
- Transformers and AutoGPTQ:
- These libraries didn’t have ARM-specific builds readily available.
- I explored recompiling them from source, but this required resolving a chain of dependencies, some of which also needed ARM-compatible versions.
3. Installation Challenges:
Here’s a breakdown of the specific challenges I encountered while attempting to set up ChatLLAMA:
-
Python Version:
- Jetson’s default Python version (3.6) was too old for many libraries.
- I manually installed Python 3.10 from source, but this introduced new challenges with package compatibility and required rebuilding the environment.
-
Torch Installation:
-
Finding and installing the correct version of PyTorch for ARM64 with CUDA support was time-intensive. After transferring the
.whlfile, I ran into issues where the architecture wasn’t properly supported. -
Commands like:
bash
Copy code
pip install torch-<version>.whlrepeatedly failed due to mismatched dependencies or unsupported features.
-
-
Slow Transfers:
- Uploading files (like the PyTorch
.whl) to the Jetson via SCP took significantly longer than expected, likely due to USB and network bandwidth limitations.
- Uploading files (like the PyTorch
-
Missing Dependencies:
- Installing packages like pyaudio for voice-based interactions resulted in errors due to missing ARM-specific libraries like
portaudio.
- Installing packages like pyaudio for voice-based interactions resulted in errors due to missing ARM-specific libraries like
Key Challenges and Issues
Here are the major takeaways from this journey:
-
Host System Compatibility:
- While the SDK Manager is easy to use, it requires Ubuntu 18.04 or 20.04 as the host OS. Archived SDKs for older Jetsons added complexity, as they needed additional manual configurations.
-
ARM vs. x86 Mismatch:
- The ARM architecture is excellent for efficiency but often requires recompilation or alternative dependencies for libraries optimized for x86.
-
Dependency Chain Complexity:
- Installing AI-related tools required not just finding ARM-compatible builds but also managing dependencies (e.g., CUDA, cuDNN) that are version-sensitive.
Although I couldn’t install Ollama on the Jetson, the journey taught me valuable lessons about:
- The differences between ARM and x86 architectures. I look forward to seeing NVIDIA’s Digits which also runs on ARM.
- Managing dependencies for embedded systems.